
Transform Your Kitchen and Bathrooms Without a Full Renovation
Cabinets make up nearly 30% of your kitchen’s visual footprint—repainting them is one of the most cost-effective ways to refresh your space without the mess and expense of a full remodel. Whether you’re in Raleigh, Durham, or anywhere across the Triangle region, homeowners are discovering that a well-executed cabinet painting project can dramatically elevate the look and feel of their homes while boosting long-term property value. Unlike complete replacements, which can take weeks and require extensive demolition, painting offers a faster, cleaner alternative with impressive results.
In this guide, you’ll learn the complete process of transforming dated or worn cabinets into sleek, modern showpieces. From selecting the right paint type and prepping surfaces like a pro to avoiding common pitfalls that lead to peeling and uneven finishes, each step is designed to deliver durable, high-end results. You’ll understand why proper sanding, primer selection, and spray vs. brush techniques matter, especially when working with solid wood, MDF, or laminate surfaces common in North Carolina homes. By the end, you’ll have the knowledge to achieve a smooth, lasting finish that stands up to daily use—no contractor required.
Gather the Right Tools: What You’ll Need for Flawless Cabinet Painting
Painting your cabinets like a pro starts long before the brush touches wood—it begins with having the correct supplies on hand. The right materials not only ensure a smooth, streak-free finish but also save time and prevent costly rework. Whether you’re updating kitchen cabinets in a Durham home or refreshing bathroom vanities across the Triangle area, a well-prepared kit makes all the difference.
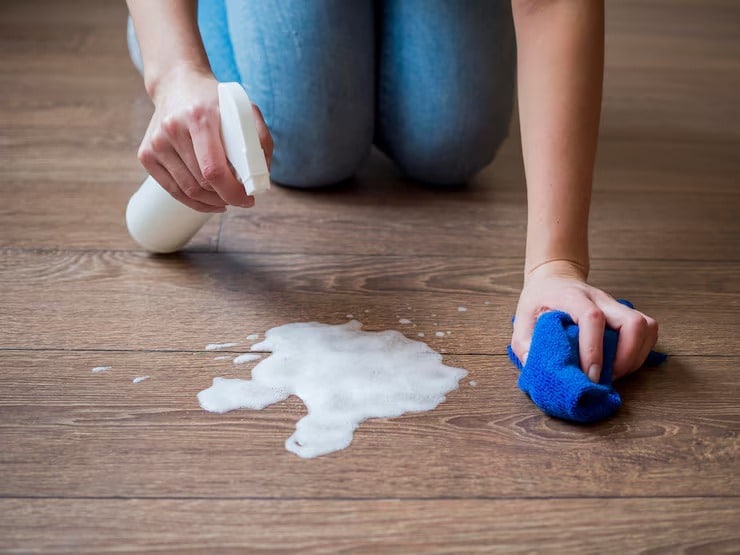
Start with high-quality cleaning supplies: a degreasing solution, microfiber cloths, and trisodium phosphate (TSP) substitute to strip away built-up grease and grime common in North Carolina kitchens. Proper surface prep is non-negotiable—without it, paint adhesion fails. Next, invest in a reliable de-sanding sponge or 120–220 grit sandpaper to scuff surfaces for better primer bond. Follow with a tack cloth to remove dust.
For paint, choose a durable, water-based acrylic or hybrid enamel formulated for cabinetry—these resist chipping and yellowing over time. You’ll also need a high-density foam roller for flat surfaces and an angled synthetic bristle brush for clean lines and corners. Don’t forget painter’s tape to protect walls and countertops, especially in tight suburban spaces where precision matters.
Lastly, arm yourself with essential hardware: screwdrivers for removing doors and drawer fronts, zip-top bags for organizing screws, and a cabinet door hinge jig if you plan to rehang partially painted doors quickly. With the right supplies, even DIYers can achieve a professional, long-lasting finish.
Prep Like a Pro: The Essential First Steps to Flawless Cabinet Painting
Before brushing on paint, proper cabinet preparation is the true foundation of a long-lasting, professional-grade finish. Skipping these critical steps can lead to peeling, uneven texture, and a finish that won’t stand the test of time—especially in high-moisture areas like Durham, NC kitchens and bathrooms. Follow this step-by-step guide to ensure your painted cabinets look crisp and endure daily wear.
1. Remove All Hardware and Doors
Start by taking off cabinet doors, drawers, and hinges. Label each piece with painter’s tape to simplify reassembly. Work on a clean, flat surface to avoid warping or damage.
2. Deep Clean Every Surface
Grease, grime, and cooking residue are the enemies of paint adhesion. Use a TSP (trisodium phosphate) substitute or a degreasing cleaner mixed with warm water. Scrub all surfaces thoroughly with a microfiber cloth, then rinse and let dry completely—this step is non-negotiable for lasting results.
3. Lightly Sand for Adhesion
Use 120–150 grit sandpaper to scuff-sand all cabinet faces and frames. This creates “tooth” so the primer bonds securely. Wipe away dust with a tack cloth afterward—never skip this cleanup step.
4. Fill and Repair Imperfections
Patch dents, screw holes, or gaps with wood filler. Once dry, sand smooth and blend into the surrounding area.
5. Prime Before You Paint
Apply a quality bonding primer—especially for laminate or glossy surfaces. Let it dry as instructed, then lightly sand again with 220 grit for an ultra-smooth base.
Taking time to prep correctly means your final paint job won’t just look professional—it will perform like one, too.
Prime Perfectly: The Secret to a Flawless Cabinet Paint Finish
Achieving a smooth, durable paint finish on cabinets starts long before the first coat—it begins with proper priming. Follow this step-by-step guide to prepare and prime your cabinet surfaces like a pro, ensuring lasting results that withstand daily wear and humidity common in North Carolina kitchens.
1. Clean Thoroughly with a Degreaser
Kitchen cabinets accumulate grease, dust, and grime over time. Use a TSP substitute or heavy-duty degreaser and a lint-free cloth to wipe down all surfaces, including doors, frames, and hinges. This step ensures optimal adhesion and prevents paint from peeling.
2. Sand for Better Adhesion
Use 180–220 grit sandpaper to lightly scuff-sand all surfaces. Focus on glossy finishes, which repel paint if not properly abraded. Wipe away dust with a tack cloth to avoid contaminating the primer.
3. Repair and Fill Gaps
Fill dents, screw holes, or cracks with a water-based wood filler. Let dry completely, then sand smooth. For cabinets in older homes across Durham or Raleigh, this step is crucial for achieving a modern, seamless look.
4. Apply a High-Bonding Primer
Use a high-adhesion bonding primer designed for cabinets or laminates. Apply with a mini roller or brush, ensuring even coverage without drips. Let dry as directed—typically 2–4 hours.
5. Lightly Sand Again Before Painting
After priming, lightly sand with 220 grit paper to eliminate brush marks and create an ultra-smooth surface. Wipe clean and proceed to paint within 24 hours for optimal bonding.
Proper prep and priming reduce callbacks, repaints, and finish failures—especially in humid Triangle-region homes.
Reassembling with Precision: The Final Steps to Flawless Cabinet Makeover Results
Once your freshly painted cabinets have fully cured, it’s time to reassemble them with care—this final phase is just as critical as prep and painting when achieving a professional finish. Start by organizing all hardware and components before installation; sort drawer pulls, hinges, and screws to avoid confusion and ensure nothing gets misplaced. If you upgraded to new hardware, confirm alignment and fit before securing them into place. When reattaching doors and drawers, double-check that hinges are properly aligned to prevent sagging or uneven gaps—small adjustments now prevent bigger issues later.
For solid, reliable mounting, use a level to verify cabinet doors hang straight, especially on older frames where settling may have shifted surfaces. Tighten fasteners gradually and evenly to avoid warping or over-compression. If you sanded and painted cabinet interiors, wipe them down with a microfiber cloth to remove dust before inserting liners or organizing painting contents. Consider adding peel-and-stick edge guards or soft-close dampers for enhanced durability and a refined user experience.
In homes across Durham, NC and the surrounding Triangle area, where humidity can affect wood expansion, ensure all components are reassembled under stable indoor conditions to maintain long-term fit. Finally, step back and inspect your work under natural light—polish surfaces with a wax-free polishing compound to elevate sheen and protect the new finish. These thoughtful final touches ensure your cabinet transformation looks professionally done and lasts for years.
Cabinet Painting Questions Answered: What You Need to Know Before You Start
What type of paint should I use for kitchen cabinets?
For long-lasting results, use a high-quality acrylic enamel or hybrid alkyd paint specifically formulated for cabinetry. These paints offer superior durability, resist chipping and moisture, and provide a smooth, washable finish. Avoid standard wall paints—they lack the hardness needed for high-touch surfaces like cabinet doors and drawers.
Do I need to prime my cabinets before painting?
Yes, priming is essential—especially when painting over glossy finishes or changing colors dramatically. A bonding primer or oil-based primer ensures proper adhesion, blocks stains, and creates a uniform surface for even paint application, reducing the risk of peeling over time.
How long does it take for cabinet paint to dry and cure?
While most paints dry to the touch within 2–4 hours, the full cure can take up to 21 days. During this time, avoid heavy use or moisture exposure. In humid climates like Durham, NC, extend drying time between coats to prevent tackiness.
Can I paint my cabinets without sanding?
Skipping sanding is risky. Lightly de-glossing with fine-grit sandpaper (220 grit) ensures paint adheres properly. For greasy kitchen cabinets, clean with a TSP alternative first, then sand and prime.
How can I prevent brush marks and achieve a smooth finish?
Use a high-density microfiber roller for flat surfaces and a fine-bristle brush for edges. Apply thin, even coats and lightly sand between layers with 320-grit paper. For a factory-like finish, consider using a paint sprayer with proper ventilation painting.
How durable is painted cabinetry, and how do I maintain it?
When properly prepped and sealed, painted cabinets can last years. Clean with a soft cloth and non-abrasive cleaner—avoid soaking moisture. In high-traffic kitchens, a clear topcoat can add extra protection.
How soon can I reinstall hardware after painting?
Wait at least 72 hours before reattaching hinges and knobs to ensure full drying and prevent sticking or smudging.
Ready to Transform Your Kitchen? Here’s What to Remember
Revamping your painting cabinets doesn’t require a contractor—it starts with the right prep, materials, and mindset. As this guide has shown, success lies in the details: thorough cleaning, strategic sanding, choosing a durable paint formulated for cabinetry, and applying thin, even coats to avoid drips and sagging. Proper drying time between coats and using high-quality brushes or sprayers make a visible difference in achieving that professional-grade finish. Homeowners in Durham, NC and throughout the Triangle region know that kitchen upgrades like cabinet painting deliver some of the highest returns in both visual appeal and long-term home value.
To ensure lasting results, always work in a dust-controlled environment, use painter’s painting tape for crisp painting edges, and don’t skip the sealing step—especially in high-moisture areas like near sinks or stovetops. Keep a consistent workflow: work top to bottom, door to frame, and label each cabinet piece during removal to simplify reassembly.
Now that you’ve learned the proven steps—from prep to protection—take the leap. With patience and attention to technique, you can achieve a results that looks custom and built to last. Turn your kitchen vision into reality—one brushstroke at a time.